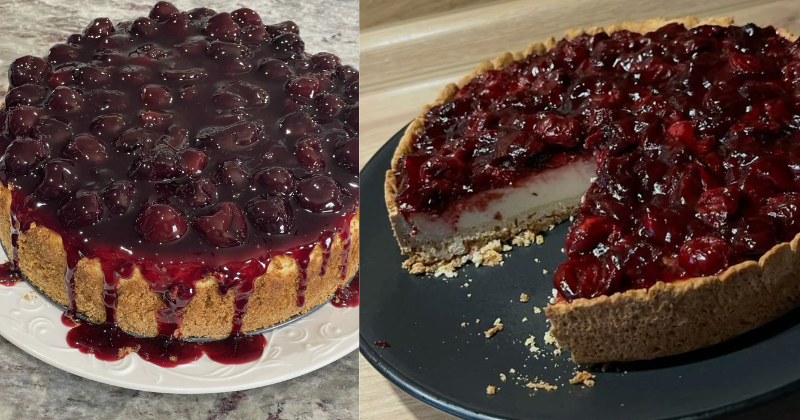
Ever dreamed of serving a show-stopping dessert that looks professionally crafted but doesn’t require advanced baking skills? This cherry cheesecake tart combines the best of both worlds: a buttery graham cracker crust, silky no-bake cheesecake filling, and vibrant cherry topping that screams elegance. Perfect for dinner parties, holidays, or any occasion where you want to impress without spending all day in the kitchen, this recipe delivers restaurant-quality results with surprisingly simple techniques.
Table of Contents
Why This Cherry Cheesecake Tart Recipe Works
Traditional cheesecake recipes often involve water baths, precise oven temperatures, and the dreaded risk of cracking. This streamlined approach eliminates those headaches entirely by using a no-bake method that’s virtually foolproof. The secret lies in properly stabilized cream cheese and gelatin, creating a filling that’s both stable and luxuriously smooth.
The graham cracker crust uses melted butter and a touch of brown sugar for extra depth, while the cherry topping combines fresh fruit with just enough cornstarch to create a glossy, professional finish. By building flavor layers and using temperature control instead of oven precision, you’ll achieve consistent results every single time. This method also allows for better flavor development, as the filling has time to set and meld overnight.
Essential Equipment and Ingredients
Key Equipment
- 9-inch tart pan with removable bottom: Essential for clean presentation and easy removal
- Food processor: Creates perfectly fine graham cracker crumbs and ensures smooth filling
- Stand mixer or hand mixer: Crucial for achieving light, airy cheesecake texture
- Medium saucepan: For preparing the cherry topping with proper heat control
- Fine-mesh strainer: Removes any lumps from the filling for professional smoothness
- Offset spatula: Helps create perfectly level surfaces and clean edges
Ingredient Selection Tips
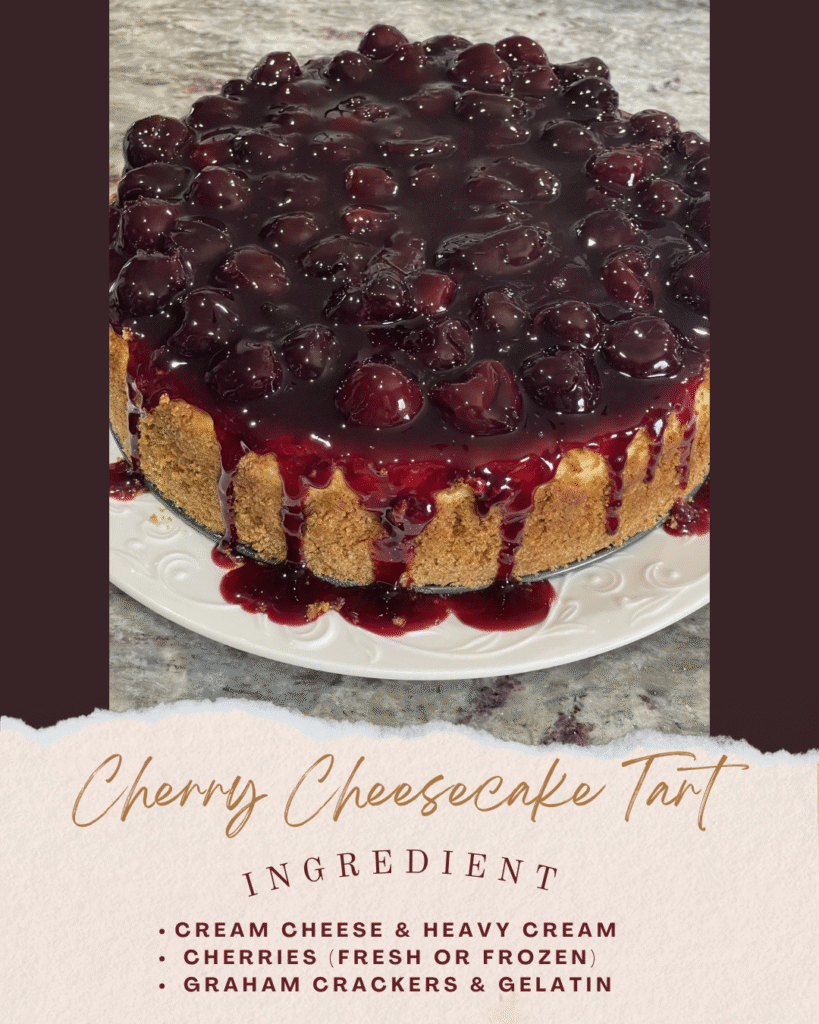
- Cream cheese quality matters: Use full-fat, name-brand cream cheese at room temperature for the smoothest texture
- Fresh vs. frozen cherries: Fresh cherries provide better texture, but high-quality frozen work well when thawed and drained
- Graham cracker selection: Choose honey graham crackers for added sweetness and complexity
- Gelatin importance: Unflavored powdered gelatin creates the perfect set without affecting flavor
- Heavy cream standards: Use cream with at least 35% fat content for proper whipping and stability
Step-by-Step Cooking Instructions
Preparation (Prep Time: 25 minutes)
Crust Preparation:
- Crush 1½ cups graham crackers in food processor until fine crumbs form. Add 3 tablespoons brown sugar and ¼ teaspoon salt, pulse to combine.
- Drizzle in 5 tablespoons melted butter while processor runs, creating evenly moistened crumbs that hold together when pressed.
- Press mixture firmly into tart pan bottom and up sides, using measuring cup bottom for even compression.
- Refrigerate crust 30 minutes while preparing filling.
Filling Preparation: 5. Sprinkle 1 packet unflavored gelatin over ¼ cup cold water, let bloom for 5 minutes. 6. Warm bloomed gelatin in microwave for 15 seconds until dissolved completely. 7. Beat 16 oz room-temperature cream cheese until perfectly smooth, scraping bowl frequently. 8. Gradually add ¾ cup powdered sugar, 1 teaspoon vanilla extract, and pinch of salt.
Cooking Method (Assembly Time: 15 minutes)
Assembly Process:
- Whip 1 cup heavy cream to soft peaks, being careful not to overbeat.
- Slowly stream dissolved gelatin into cream cheese mixture while beating on low speed.
- Fold whipped cream into cream cheese base in three additions, maintaining light texture.
- Pour filling into chilled crust, smoothing top with offset spatula.
- Refrigerate minimum 4 hours or overnight for proper set.
Cherry Topping: 6. Combine 2 cups fresh cherries (pitted), ⅓ cup sugar, 2 tablespoons water, and 1 tablespoon cornstarch in saucepan. 7. Cook over medium heat, stirring gently, until mixture thickens and becomes glossy (5-7 minutes). 8. Cool completely before spreading over set cheesecake layer.
Pro Tips for Perfect Results
Temperature control is everything: Room temperature cream cheese blends smoothly without lumps, while cold cream whips to proper peaks. Never rush these temperature requirements.
Gelatin technique mastery: Always bloom gelatin in cold liquid first, then warm just until dissolved. Overheating destroys gelatin’s setting power, while under-dissolving creates grainy texture.
Folding finesse: When incorporating whipped cream, use gentle folding motions to maintain airiness. Overmixing deflates the cream and creates dense filling.
Cherry preparation wisdom: If using fresh cherries, pit them over a bowl to capture juices for the topping. Frozen cherries should be thawed completely and excess liquid drained to prevent watery topping.
Setting patience: While tempting to serve early, proper chilling time ensures clean slices and stable texture. Plan ahead for best results.
Serving Suggestions and Variations
How to Serve
Present this tart on a white porcelain plate to showcase the vibrant cherry color contrast. Serve chilled with a dollop of freshly whipped cream or vanilla bean ice cream. For elegant dinner parties, garnish individual slices with fresh mint leaves and a light dusting of powdered sugar.
Pair with champagne, dessert wines like Moscato, or a rich coffee service. The tart’s balance of creamy and fruity flavors complements both sparkling and still beverages beautifully.
Recipe Variations
Berry medley version: Replace cherries with mixed berries (strawberries, blueberries, raspberries) for colorful seasonal appeal.
Chocolate crust upgrade: Substitute chocolate graham crackers or add 2 tablespoons cocoa powder to regular crumbs for deeper flavor.
Lemon cheesecake base: Add 2 tablespoons fresh lemon juice and 1 tablespoon lemon zest for bright citrus notes that complement any fruit topping.
Individual tart portions: Use 4-inch mini tart pans for elegant single servings, perfect for formal dinner parties.
Storage and Make-Ahead Tips
This tart actually improves with time, making it perfect for advance preparation. Store covered in refrigerator for up to 4 days, with optimal flavor and texture developing after 24 hours of chilling.
For make-ahead convenience, prepare the tart completely up to 3 days before serving, adding cherry topping on the day of service for best appearance. The crust can be prebaked and stored at room temperature for 2 days before assembly.
Freezing is not recommended as it compromises the creamy texture, though the crust alone freezes well for up to 1 month when wrapped properly.
Nutritional Benefits
Fresh cherries provide powerful antioxidants, vitamin C, and natural anti-inflammatory compounds. The calcium-rich cream cheese offers protein and essential nutrients, while the moderate portion size makes this an indulgent yet reasonable dessert choice.
Each slice contains approximately 380 calories with good balance of fats, carbohydrates, and protein, making it satisfying without being overly heavy after a full meal.