Ever wondered how to recreate that perfect balance of crispy breaded chicken, rich curry sauce, and fluffy rice that makes Japanese curry houses so irresistible? This chicken katsu curry recipe transforms your kitchen into a professional Japanese restaurant, delivering that coveted combination of textures and flavors without requiring specialty equipment or hard-to-find ingredients. In just 45 minutes, you’ll master the art of golden, crunchy katsu paired with a deeply satisfying curry that’s both comforting and sophisticated—perfect for impressing dinner guests or treating your family to something special.
Table of Contents
Why This Chicken Katsu Curry Recipe Works
This recipe succeeds where others fall short by addressing the three biggest challenges home cooks face with Japanese curry: achieving perfectly crispy katsu that stays crunchy, creating a curry sauce with authentic depth of flavor, and timing everything so each component is ready simultaneously. Instead of the traditional time-intensive method of making curry roux from scratch, this streamlined approach uses high-quality curry blocks combined with strategic flavor layering to develop complexity quickly.
The katsu technique eliminates common pitfalls like soggy coating or overcooked chicken by using a double-dredging method and precise oil temperature control. Meanwhile, the curry builds umami through careful ingredient sequencing—sautéing aromatics, blooming spices, and incorporating curry blocks at the optimal moment for maximum flavor integration. This method produces restaurant-quality results while keeping the process manageable for home kitchens, ensuring both components reach perfection without overwhelming the cook.
Essential Equipment and Ingredients
Key Equipment
Large Heavy-Bottomed Pot – Essential for even heat distribution when building the curry base and preventing scorching during the simmering process.
Cast Iron Skillet or Heavy Pan – Maintains consistent oil temperature for perfectly golden katsu with even browning and optimal crunch.
Instant-Read Thermometer – Takes the guesswork out of oil temperature (340°F is ideal) and ensures chicken reaches safe internal temperature of 165°F.
Wire Cooling Rack – Allows excess oil to drain while maintaining katsu crispiness—never use paper towels which create soggy bottoms.
Sharp Chef’s Knife – Critical for achieving uniform chicken cutlet thickness, ensuring even cooking and professional presentation.
Rice Cooker or Heavy-Bottomed Saucepan – Produces consistently fluffy, properly textured Japanese-style short-grain rice.
Ingredient Selection Tips
Chicken Breast Quality – Choose organic, free-range chicken breasts for superior flavor and texture. Look for pieces that are naturally thick and uniform—avoid enhanced or pre-marinated options that can affect breading adhesion.
Japanese Curry Blocks – Vermont Curry or Golden Curry brands offer authentic flavor profiles with the right balance of spices and thickness. Avoid generic curry powders which lack the complex sweetness and depth characteristic of Japanese curry.
Panko Breadcrumbs – Authentic Japanese panko creates dramatically superior texture compared to regular breadcrumbs. The larger, airier flakes produce exceptional crunch and stay crispy longer.
Short-Grain Rice – Koshihikari or Calrose varieties provide the proper stickiness and texture that complements curry perfectly. Long-grain rice won’t achieve the authentic Japanese experience.
Neutral Frying Oil – Vegetable or canola oil with high smoke points ensure clean frying without off-flavors that could compete with the delicate curry spices.
Step-by-Step Cooking Instructions
Preparation (Prep Time: 20 minutes)
Begin by starting your rice—this takes the longest and should cook while you prepare other components. Rinse short-grain rice until water runs clear, then cook using a 1:1.2 rice-to-water ratio for optimal texture.
Prepare chicken by pounding cutlets to uniform ½-inch thickness between plastic wrap. This ensures even cooking and prevents dry edges while maintaining juicy centers. Season both sides generously with salt and pepper, allowing 10 minutes for seasoning to penetrate.
Set up your breading station with three shallow dishes: flour seasoned with salt and pepper, beaten eggs with a splash of milk for richness, and panko breadcrumbs. This assembly-line approach streamlines the coating process and prevents messy cross-contamination.
Dice onions, carrots, and potatoes into bite-sized pieces—consistent sizing ensures even cooking. Mince garlic and ginger finely for maximum flavor release. Having all vegetables prepped before cooking begins prevents rushed preparation and ensures proper timing.
Cooking Method (Cook Time: 25 minutes)
Start the Curry Base (8 minutes): Heat oil in your heavy-bottomed pot over medium heat. Sauté diced onions until translucent and slightly caramelized, about 5 minutes. This foundational step builds essential sweetness that balances the curry’s spice complexity. Add minced garlic and ginger, cooking for 1 minute until fragrant but not browned.
Build Curry Depth (12 minutes): Add diced carrots and potatoes, stirring to coat with aromatics. Pour in chicken or vegetable stock, bringing mixture to a gentle boil. Reduce heat and simmer until vegetables begin softening, approximately 8 minutes. The vegetables should be tender but still hold their shape—overcooking creates mushy texture.
Incorporate Curry Blocks (5 minutes): Remove pot from heat before adding curry blocks—this prevents scorching and ensures smooth integration. Break blocks into pieces and stir until completely dissolved. Return to low heat, simmering gently while stirring occasionally. The curry should coat the back of a spoon when ready.
Fry the Katsu (8 minutes): While curry simmers, heat oil to 340°F in your heavy skillet. Dredge seasoned chicken through flour, beaten egg, and panko, pressing breadcrumbs gently to ensure adhesion. Fry cutlets for 3-4 minutes per side until golden brown and internal temperature reaches 165°F. Don’t overcrowd the pan—work in batches if necessary.
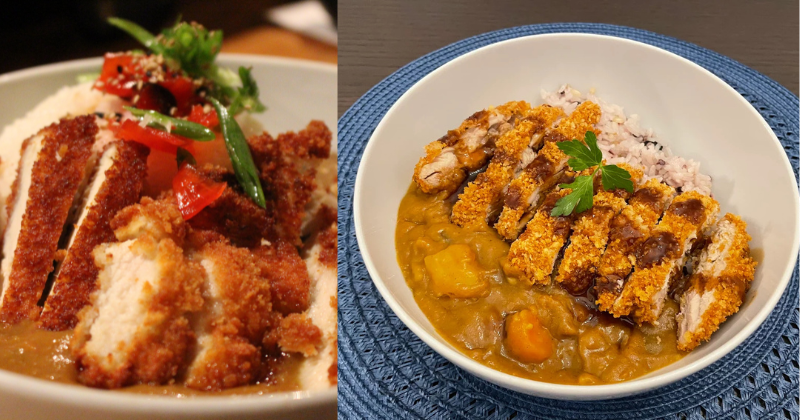
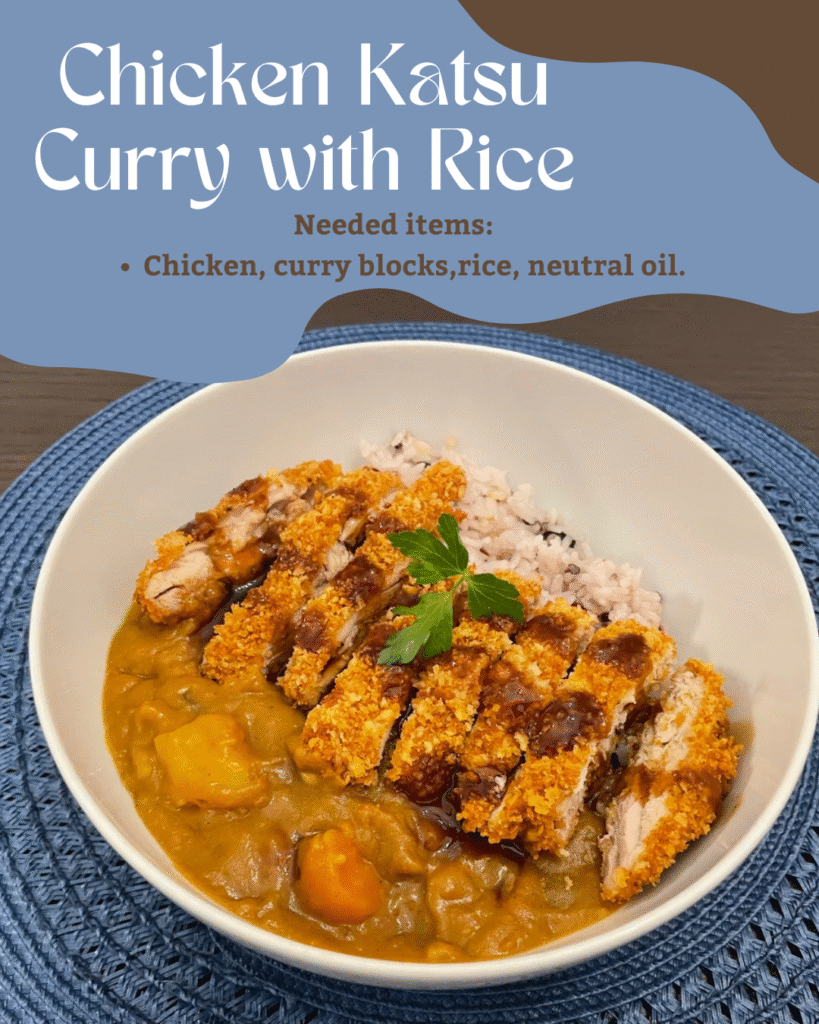
Final Assembly: Transfer fried katsu to wire rack for 2 minutes to drain excess oil. Slice diagonally into strips for traditional presentation. Serve immediately over rice with curry ladled alongside, maintaining component separation for optimal texture contrast.
Pro Tips for Perfect Results
Temperature Control is Everything: Maintain oil temperature between 335-345°F for optimal katsu results. Too low creates greasy, soggy coating; too high burns exterior before interior cooks through. Use thermometer consistently rather than relying on visual cues alone.
Double-Dredge Technique: For extra-crispy katsu, perform a second egg and panko coating after the initial breading. This restaurant technique creates exceptionally thick, crunchy coating that stays crispy longer and provides better texture contrast.
Curry Consistency Mastery: If curry becomes too thick, thin with warm stock rather than water to maintain flavor intensity. For thicker consistency, simmer uncovered for additional 5-10 minutes, stirring frequently to prevent sticking.
Timing Synchronization: Begin rice first, start curry base second, then prepare and fry katsu last. This sequence ensures all components finish simultaneously at optimal serving temperature.
Resting Prevents Sogginess: Allow fried katsu to rest on wire rack for 2-3 minutes before slicing. This brief drainage period removes excess oil while internal juices redistribute, preventing soggy bottoms when plated.
Serving Suggestions and Variations
How to Serve
Present this dish on individual plates with rice forming the base, curry ladled to one side, and sliced katsu arranged in overlapping pieces on top. Garnish with finely chopped scallions and a small portion of pickled vegetables (tsukemono) for authentic Japanese presentation.
Complement the meal with miso soup as a starter and serve Japanese-style pickled cabbage or cucumber salad as palate-cleansing sides. For beverages, cold Japanese lager, sake, or green tea enhance the dining experience without overwhelming the curry’s complex flavors.
Recipe Variations
Pork Katsu Curry: Substitute pork tenderloin for chicken, adjusting cooking time to ensure internal temperature reaches 145°F for optimal tenderness and safety.
Vegetarian Version: Replace chicken with thick-sliced eggplant or cauliflower steaks, reducing frying time to 2-3 minutes per side for perfect texture without overcooking.
Spicy Katsu Curry: Add 1-2 teaspoons of Korean gochujang or Japanese shichimi togarashi to the curry base for heat that complements rather than overwhelms the dish’s balance.
Seafood Adaptation: Use large shrimp or firm white fish fillets, reducing cooking time significantly and monitoring carefully to prevent overcooking and tough texture.
Storage and Make-Ahead Tips
Store leftover curry and rice separately in refrigerator containers for up to 3 days. The curry actually improves in flavor as spices meld overnight, making it excellent for meal prep. Reheat curry gently on stovetop with splash of stock if needed to restore proper consistency.
Katsu is best consumed immediately but can be stored refrigerated for 24 hours. Reheat in 400°F oven for 5-7 minutes to restore crispiness—avoid microwave which creates soggy coating. For make-ahead preparation, bread chicken cutlets up to 4 hours in advance and refrigerate covered until ready to fry.
Curry base can be prepared completely up to 2 days ahead, allowing for easy weeknight assembly. Simply reheat curry while preparing fresh katsu for optimal results combining convenience with quality.
Nutritional Benefits
This balanced meal provides high-quality protein from chicken, complex carbohydrates from rice, and valuable nutrients from curry vegetables including beta-carotene from carrots and potassium from potatoes. The curry spices offer anti-inflammatory properties, while the controlled portions create a satisfying meal that supports healthy eating goals without sacrificing flavor or satisfaction.